Carissa asked me to make some earrings that would match her purple and pink tops. The concept pics she sent me were of a corsage, so I wanted to incorporate that feel in the pieces. I also got this book last week, which actually is Amazing! I used the techniques to create roses, buds and leaves for these earrings.
Saturday, April 30, 2011
Friday, April 29, 2011
Easter (A little late)
Easter at our place was pretty simple. We didn't really have a lot of time to prepare before hand, so we didn't have much of a feast or lots of decorations. We did however, have a wonderful afternoon last Sunday baking and decorating eggs!
My mother used to make amazing hot cross buns for Easter, so I wanted to try my hand at it. I googled recipes, and found that unlike my mom's simple sweet bread, most hot cross bun recipes use spices in the dough. Always game to use cardamom, I decided to give it a shot!
 |
| As always, Sheldon tries to "help" |
 |
| Grinding the Cardamom |
 |
| I think I ended up using a mix of cardamom, nutmeg, allspice, cinnamon and cloves. It was delicious. |
 |
| Yum! I was too impatient to try them and put the frosting on while they were still hot (They are called "Hot" cross buns, right!?), and that melted, but they still tasted really good. |
And now for the eggs!
 |
| We found this kit at Michaels, and anyone who knows Henry and me knows that we are easily distracted by shiny objects. It was a no-brainer pick. |
 |
| I'm coloring on my egg with a crayon to make a polka dotted egg. |
 |
| Kitty Kisses! |
 |
| Didn't they turn out cool? |
 |
| Påskbordet, ready for our festive dinner of spaghetti. |
Thursday, April 28, 2011
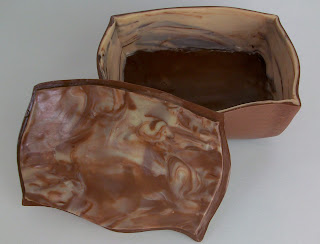
Linda's Box
This was my biggest and most time intensive project yet. I spent hours sanding the outside of the box to get a smooth and satiny feel, and then finished the box with 3 coats of polyacrylic to protect it and make it shiny.
Would you like a personalized box? Contact me, and I'll make something special for you.
Wednesday, April 27, 2011
Where does the time go? (and Wednesday's Sheldon Pic)
 |
| He's just chillin. |
Wednesday, April 20, 2011
Sheldon on Wednesdays
This cat is too hilarious not to post weekly on him. This week he spent an entire morning stalking the door as Henry worked on scanning on the other side. He kept doing flips to try to get the fingers.
Another favorite game is to play "monster in the couch". He loves to hide under the sheet when we put a fresh one on the futon. He'll then pounce on anything that moves from under the sheet. Great fun!
Tuesday, April 19, 2011
My first special order!
I haven't had a lot to put up in the last week because I've been working hard on my most ambitious project yet. Elis is a photographer (check out her blog here), and asked me to make her a piece based on her baby, a Pentax K1000. I've mostly been making stuff based on alive things, so it was interesting and challenging to try something inanimate.
I got to try some really cool techniques to make the lens and view finder, and I love how they turned out. I used translucent clay and brushed it with pastels. After I baked it, I just coated those pieces with the polyacrylic, so they are the only shiny pieces on the camera. I think they really look like glass!
I also got to play with my packaging materials, since this is my first "sold" piece. I made a box out of card stock and printed my rudimentary logo on it. I'd like to make the logo a little fancier, but I ran out of time. I'm excited to work on creating an image for BotanyBoeh that can tie my packaging, Etsy shop and this blog all together. Stay tuned though, it might take me a while!
Wednesday, April 13, 2011
Tuesday, April 12, 2011
Botany Boeh is on Etsy!
So far I've listed:
Plant Labels
I got so excited that my Amorphophallus pranii was sprouting for the spring that I needed to make a label for it. The plastic tag just wasn't cool enough for this awesome plant. I don't know that mine will ever be big enough to flower, but I wanted to show the inflorescence on the tag.
I realized I could use this technique to make just about any plant label, so here's Lavender. This one will be on sale when the etsy shop goes up. If you want to order something specific, let me know!
Monday, April 11, 2011
Test Tube Vase Tutorial
 |
| Spring Wildflowers |
 |
| Boston Fern Basket |
You are going to need:
Polymer Clay (I use Sculpey III ~$2 for a 2 oz block)
A strong button magnet (I used rare earth magnets ~$3.00 for pack of 3)
Test tube (~$0.45 a piece)
Take a chunk of clay and roll it out. You want it fairly thick so its nice and strong.
Cut a strip about 2 inches long, and half an inch wide. Make yours as skinny or thick as you like, it's just got to be able to hold your magnet.
Wrap the clay around the test tube, and trim it so that it overlaps the width of the magnet in the back (about half an inch). This is so that the place where the magnet goes is thicker than the front of the piece.
Smooth down the edges so that it looks nice and even.
Press magnet into this thicker back portion so that it is seated firmly. You don't need to leave the magnet in place at this point since you don't really want to bake the magnet. I just leave it there to make sure the form stays nice.
You can make your test tube bud vase in whatever design you like using this basic concept, but for the purpose of this tutorial, we'll add some fun details.
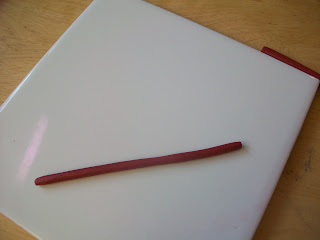
Roll a worm of clay so that its fairly skinny and even.
Using a razor blade, cut the worm in half so that you have two half circle worms.
Wrap one around the top of the clay, and the other around the bottom, trimming the ends and smoothing the edges.
Roll a very skinny worm of brown clay, I trimmed it with a razor blade so that it was even skinnier than I had rolled it.
Apply to vase in a random fashion. Make loops or squiggles for interest
Form a number of little balls of brown clay for leaves
Take a tool and press a line in the center (you can use a butter knife, or anything with a dull fine edge)
Add diagonal indents for the leaf veins
Squish the ends to make a leaf shape
Apply to the squiggled worm on the vase. I also added little spirals to make it look like a vine.
Here the vase is ready for baking. I took the magnet out of the back, and made sure the indent stayed nice and round so the magnet would fit back in after I baked it. Bake according to package directions, my Sculpey III, I bake it in my oven at 275 degrees for about 15 minutes on the ceramic tile.
After the vase cooled I used E-6000 cement (my favorite, but super glue would work as well) to glue the magnet into the vase.
Squeeze a bit into the indent on the vase, and firmly press the magnet in place. Use a paper towel to wipe off any stray glue drool around the edges.
I like to finish my pieces with a protective varnish, I use a water based polyacrylic, but to be honest, I just use this because I had it sitting around and it seems to work. I'm sure there are a number of other products that would also work well. Brush a thin coat on and let dry for 2 hours. Add two additional coats at least 2 hours apart to finish, and wait 24 hours to use.
This vase will be available in my etsy shop, along with the two at the top of the page, as soon as I get it going. I'm just waiting on tax info, and then I should be up and running! Look for me!
Subscribe to:
Posts (Atom)


