 |
| Spring Wildflowers |
 |
| Boston Fern Basket |
You are going to need:
Polymer Clay (I use Sculpey III ~$2 for a 2 oz block)
A strong button magnet (I used rare earth magnets ~$3.00 for pack of 3)
Test tube (~$0.45 a piece)
Take a chunk of clay and roll it out. You want it fairly thick so its nice and strong.
Cut a strip about 2 inches long, and half an inch wide. Make yours as skinny or thick as you like, it's just got to be able to hold your magnet.
Wrap the clay around the test tube, and trim it so that it overlaps the width of the magnet in the back (about half an inch). This is so that the place where the magnet goes is thicker than the front of the piece.
Smooth down the edges so that it looks nice and even.
Press magnet into this thicker back portion so that it is seated firmly. You don't need to leave the magnet in place at this point since you don't really want to bake the magnet. I just leave it there to make sure the form stays nice.
You can make your test tube bud vase in whatever design you like using this basic concept, but for the purpose of this tutorial, we'll add some fun details.
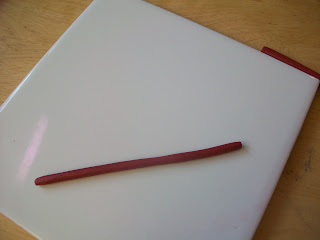
Roll a worm of clay so that its fairly skinny and even.
Using a razor blade, cut the worm in half so that you have two half circle worms.
Wrap one around the top of the clay, and the other around the bottom, trimming the ends and smoothing the edges.
Roll a very skinny worm of brown clay, I trimmed it with a razor blade so that it was even skinnier than I had rolled it.
Apply to vase in a random fashion. Make loops or squiggles for interest
Form a number of little balls of brown clay for leaves
Take a tool and press a line in the center (you can use a butter knife, or anything with a dull fine edge)
Add diagonal indents for the leaf veins
Squish the ends to make a leaf shape
Apply to the squiggled worm on the vase. I also added little spirals to make it look like a vine.
Here the vase is ready for baking. I took the magnet out of the back, and made sure the indent stayed nice and round so the magnet would fit back in after I baked it. Bake according to package directions, my Sculpey III, I bake it in my oven at 275 degrees for about 15 minutes on the ceramic tile.
After the vase cooled I used E-6000 cement (my favorite, but super glue would work as well) to glue the magnet into the vase.
Squeeze a bit into the indent on the vase, and firmly press the magnet in place. Use a paper towel to wipe off any stray glue drool around the edges.
I like to finish my pieces with a protective varnish, I use a water based polyacrylic, but to be honest, I just use this because I had it sitting around and it seems to work. I'm sure there are a number of other products that would also work well. Brush a thin coat on and let dry for 2 hours. Add two additional coats at least 2 hours apart to finish, and wait 24 hours to use.
This vase will be available in my etsy shop, along with the two at the top of the page, as soon as I get it going. I'm just waiting on tax info, and then I should be up and running! Look for me!


*poke* I followed you!
ReplyDelete